


Review for HDR Express
Photography is a passion of mine, I will ramble on a lot here, for which I apologise in advance. If you just want to get straight to the product, skip to the next page, I won't be upset. It's okay, really, I won't even know you did it.
Digital photography is a wonderful thing, not because it has allowed anyone to instantly see the pictures they've shot, reduced the cost of shooting them, and increased the proliferation of snappy snaps. Sure, those are all nice and all, plus it is great for many people who wish to record the various stages of their kids childhood, family breakdowns, and so on. But the fact remains, for 99% of the people who take pictures, 99% of the shots they take are dull and meaningless to anybody who doesn't know them.
Sounds harsh? Next time, take a good look at your favourite snaps of family or friends, and ask yourself truthfully the following question. If you didn't know the people in them, would you really honestly give a damn about that "great" photo? Is that shot of some building you went to see in Italy good because it reminds you of your trip there, or good simply because well done, you got it all into frame?
No, digital photography is a wonderful thing because it has allowed thousands upon thousands of dedicated amateur enthusiasts to really learn about the art, both technical and otherwise, of taking and making good photographs, without having to be rich, or making yourself poor. Before we had digital SLRs, if you just wanted to go beyond the basics of framing a shot, and actually learn much about depth of field, the right exposures for the right situations, appropriate shutter speeds, and so on, you'd be painstakingly writing down settings for every shot in a notebook, forking out about 30p every time you clicked the shutter.
Then you'd have to wait a few days, and have no control over the final prints, unless you could afford a load of expensive equipment and chemicals. If you could afford these, then a whole new world of possibilities would open up, but again learning all the techniques of developing and processing your pictures would eat a load more of your cash. And all of that is on top of learning what makes a good photograph.
But today, with the ever tumbling prices of digital SLR cameras, once you've bought one and a lens to go with it, most of the expense is behind you. With the high dynamic range that shooting in RAW allows you to play with, even the developing of images has been revolutionised by such commercial applications as Apple's Aperture and Adobe's Lightroom, and recent free offerings such as RawTherapee and BlueMarine. Now you can have the versatility of your own darkroom, without having to own a darkroom. Tweak colour balance, grain, sharpness, vignetting, all sorts of non-destructive alterations are at your disposal.
So what is HDR Photography?
The thing these applications don't do, at least for now, is offer you the ability to combine multiple photographs of different exposures into one. Why would you want to do this? Well anyone who has taken a picture in lighting conditions which are far from perfect will soon have realised the eye is much better than a camera at dealing with the differences between bright areas and dark ones. It does this for two reasons, the first being it can simply see more levels of difference than the camera sensor can manage, and the second more important reason, it utilises a dynamic system called the iris.
When you look into a dark area, the iris will open to let in more light, much like the aperture on your camera does. When you look at a bright area, it will close to reduce the light and improve the contrast. But because your brain sees what is effectively a live video stream, you don't always notice it even doing this, unless you walk out into bright sunshine from a dark room, or vice versa. A camera gets one single frame to capture as much detail as it can, and you have to decide what you want to capture, the detail in the highlights or that in the lowlights. Only in the most controlled and artificial lighting conditions can you set things up so it can accurately expose its sensor to everything.
The difference between the lightest and the darkest parts of a scene that a camera's sensor can detect, is called its dynamic range. Your eye has a wider dynamic range, and when combined by the fact that your iris allows more and less light in any time it fancies it, you can see in a very high dynamic range, far more than a camera can capture. This often leads to disappointment with some photographs, they just don't look how you remember seeing them.

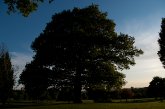
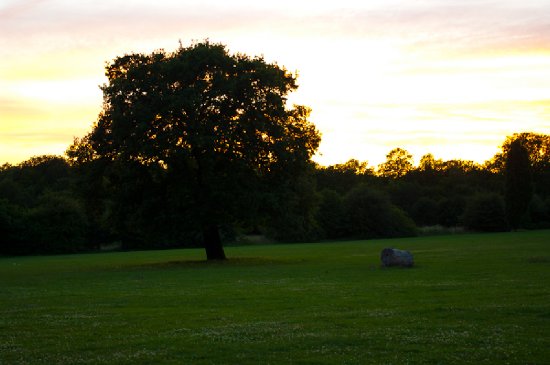
Let's take a sunset as an example. To catch the wonderful colours in the clouds and the atmosphere, requires an exposure which renders everything that isn't the sky a black silhouette. Getting the exposure which shows the much darker land based world, results in a blown out detail free sky. You can't win! Well actually you can, using a technique that has been used by photographers ever since the film days. You take multiple pictures, one which covers the correct exposure for each feature you wish to see. Then later on, in the darkroom (digital or otherwise) you combine the two images into one.
Obviously this is the sort of thing that is much easier to do in Photoshop than a chemical filled darkroom, the latter would involve making a mask to cover one half of the image whilst you exposed the other, and then the opposite. Needless to say lining things up was difficult, time consuming and prone to errors, especially as at this stage of the process you can't even see anything on the photo paper you are exposing.
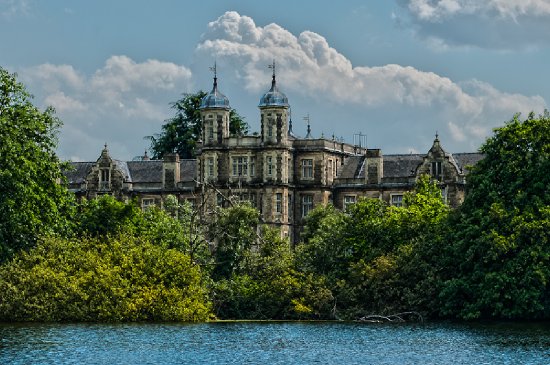
Now HDR photography is essentially this process, but automated and taken one stage further using a technique called tone mapping or local contrast control. The general idea is you take a range of shots at different exposures, load them into some software which then combines all the images into one single picture, with each pixel containing information that covers a much higher dynamic range.
Using clever maths, HDR software can go way beyond what was possible in film days, producing anything from a natural look which is close to what your brain remembers seeing, right through to extreme contrasty almost computer generated visions of neon loveliness. It all depends on your tastes, and sometimes what software you use. For instance, Adobe Photoshop CS includes the ability to create a HDR image from a number of others, including doing a half decent job of aligning handheld ones too. But the only look you can get with it, is the natural one, extreme tone mapping is right out here.
Over the last year or two I've tried a few options, some fast, some fiddly, none of them perfect. The latest one to catch my eye is from a company called Unified Colour, which offers a range of three HDR products, the entry level of which is HDR Express. Aimed at amateur photographers such as myself, it describes itself as nothing less than "the game-changer in HDR software." Quite a boast, let's see how it shapes up to the competition.
Installation and Beyond
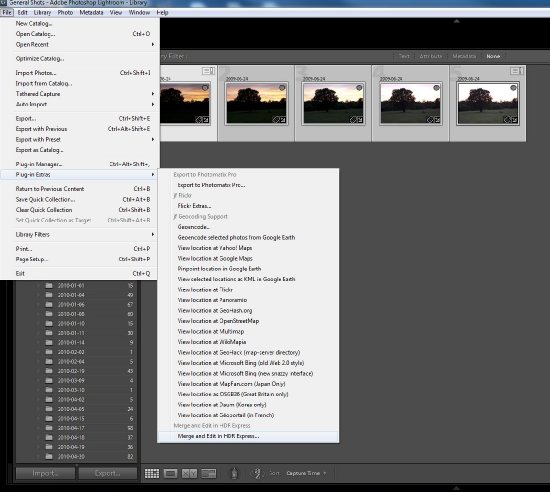
HDR Express comes in both 32 bit and 64 bit Windows versions, picking the right one during installation automatically, both being provided in the same download, and as a Mac OS flavour. Along with the application itself, it also installs a plug-in for Lightroom and Aperture if you have either of those, the latter obviously only being for Mac users.
The plug-in for Lightroom, is just a convenient way of exporting images to the main application, which might be useful if for some reason it doesn't support the RAW format of your camera since LR converts things to a TIFF when exporting. It supports the reading of RAW, JPEG, TIFF and BEF formats, that latter one being the head scratcher. No, we'd never heard of it either, but it appears to be the creation of Unified Color and uses a lossy compression system which is geared specifically towards HDR images. They describe it as high quality HDR files at JPEG file sizes.
As a quick example, the TIF version of a file we made with the application was 83MB, whilst the BEF was a mere 17MB, only a few MB larger than just one of the DNG files we used to create the HDR with. I'm not quite sure what the point of this file type actually is, other than saving space. It might be more useful if Lightroom supported it directly, but I don't think it does unless you have another plug-in which comes with the more expensive HDR Expose. If it contained an accurate representation of the combined HDR image before any tone-mapping, so you could reload it and tweak your work without having to combine the original images again, it might have been interesting.
Before we leave the Lightroom plug-in and move onto the application itself, that works quite well with HDR Express. Once you've saved your image, it gets automatically stacked in Lightroom with the first of the range you selected for the whole tone mapping process.
The Interface
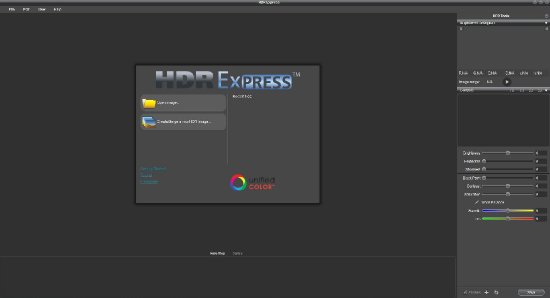
Anyway, back to the main business at hand. The interface will be familiar to many people, going for the now traditional grey look with sliders and histogram on the right of the screen, and thumbnails at the bottom. When you first open it directly and not from a plug-in, you get a few options, open a single image or open a bunch of them, open a recent file or click on a few links to tutorials on how to use the application. I guess if I'm getting picky I'd wonder why there are separate options for opening one file or many, but really I am just being picky here.
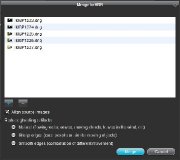
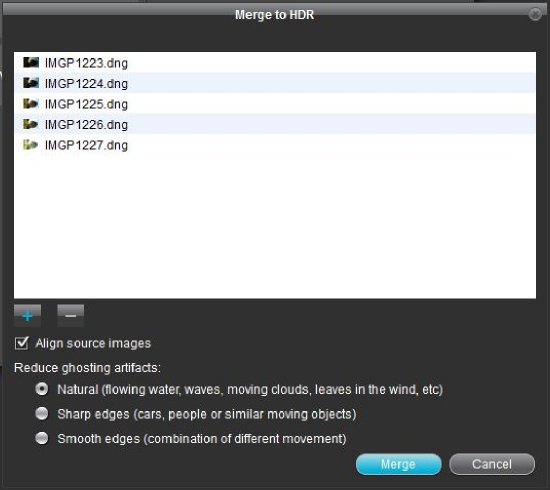
If you choose to open multiple images, you get a second dialog popup in which you can add as many images as you wish to merge, plus a checkbox for enabling image alignment, and radio buttons for which technique you wish the program to use when removing ghosting artifacts. Aligning images accurately has proven to be quite a challenge for this sort of software over the years, none of them really manage it perfectly. HDR Express is quick at the task, but far from perfect, though I guess it does an OK job for an entirely automated process. You still wouldn't want to go handheld unless you really had no choice, and even then you'd have to accept some alignment errors even on simple scenes.
The options to deal with ghosting are Natural, aimed at water, clouds, leaves blowing in the wind, Sharp Edges, which is for cars, people and such like, and Smooth Edges, which is described as ideal for combinations of the above. Having tried two of the three options and not actually seeing any difference, I decided to just move on and put it down to my source material not having much in the way of movement for any of the three to have much work to do.
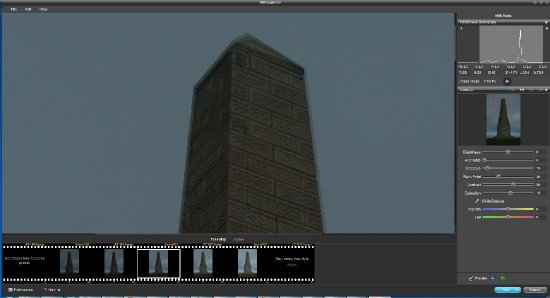
Once selected, your memory and CPU gets eaten up a bit, especially when 14MP images, and a progress bar appears. A very detailed one at that, reminding me very much of SimCity's reticulating splines messages. It doesn't take long to import and process 5 RAW format pictures, less than a minute on my system in fact. Once it has done the magic, you are presented with an animation which shows the image across it's entire dynamic range, from darkest to lightest exposures. Nice at first, but it will get annoying very quickly and you'll soon be at the preferences dialog to turn it off.
At this point the hard work is done and you can select one of a few tone-mapping presets at the bottom, each via a thumbnail accurately representing the effect on your current image. Happy with that selection, you can then click the Styles link (which should really be a proper button rather than a hyperlink) and pick from another bunch of presets. All either selection does is modify some or all of the 8 sliders to various positions, offering a quick way to get the start of the look you wish to achieve. Another minor niggle here, the scrollbar below the styles is a ridiculously small target and could really do with being made taller.
From here on in, HDR Express begins to shine. Rather than complicating the process with awkward hard to understand sliders, or over simplifying it, they've got things spot on. If you want to adjust the overall image exposure you drag the Brightness, boost detail in the lighter parts of the image you drag the Highlights, make the darker bits richer, drag the Shadows. Other important options are the Black Point, Saturation, Warmth and Tint which all do the same thing as in Lightroom and other apps, so will be familiar to everyone.
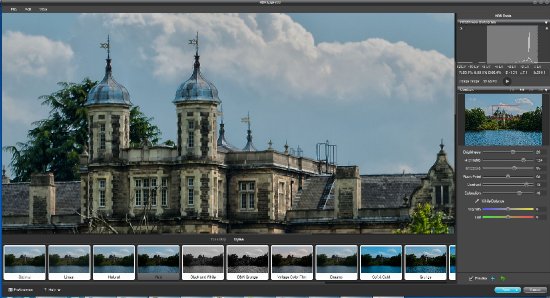
But the one which makes the biggest change to the image, is the Contrast slider. Now this is where the biggest magic happens, as this is the slider which determines how strong the local contrast is increased. Around the middle mark and you'll have something quite pronounced but still pretty natural. Take it all the way to the max and you'll have that over the top heavy HDR look that divides much of the photographic community.
The Actual Results
So onto the actual results you can achieve by messing with the sliders. I've taken a few shots and used HDR utilities in the past to process them, so it seemed a good idea to shove the same original source material through HDR Express and see what it could achieve. Since each application will use its own algorithm for achieving tone mapping, etc, you can never expect any two pieces of HDR software to produce an identical look. So ultimately whether you are happy with the resulting output will come down to personal preference.
HDR Express isn't perhaps as responsive with the sliders as one might wish, but it does produce a preview of its output pretty quickly, taking at the absolute most a few seconds. This does let you play around with a wide variety of major changes before you decide to save the final output. The suggested Style defaults offer a good starting point for many different looks, and you can configure your own as well, choosing exactly which sliders to limit them to which is a nice touch.
Having tried quite a few HDR options over the last two years, both free and commercial, HDR Express has managed to produce not only the best results, but with the minimum of effort. It lacks the manual alignment feature of Media Chance's Dynamic Photo-HDR, and the interface isn't as responsive, but at the same time it is much less complicated and the results are much better.
In comparison to the last version of Photomatix Pro I tried, which was version 3 if I recall, it produces equally good results but again with so much less fiddling about. I've certainly managed to create very similarly looking images to those I managed with Dynamic Photo-HDR and Photomatix Pro, but in about a third of the time.
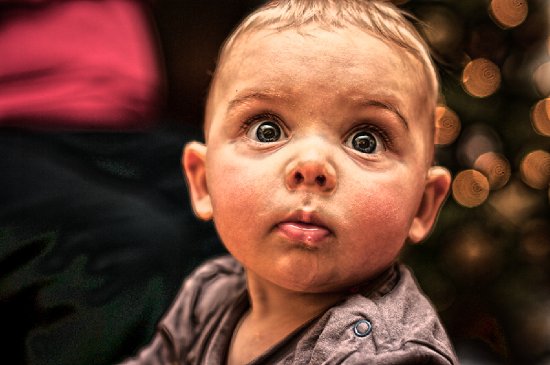
Applying HDR to single RAW images is another great way to liven them up, and again HDR Express produces very nice and easily controlable results. I've included one here of my nephew William, to show a very common look that you might have seen people applying to their images these days. Not everyone's cup of tea but personally I don't see the harm in this kind of effect now and again.
Conclusion
Priced at $99, HDR Express costs the same as both Photomatix Pro and somewhat more than Dynamic Photo-HDR. It has a much simpler interface than both, which is far from a bad thing, and if you can accept the fact that a tripod is really needed for HDR work, it is definitely the current front runner in this ever crowded specialist area of photo manipulation software.
The results it manages are excellent and so easy to achieve with very little fiddling, when so many alternatives have dials and switches that confuse more than delight, it's nice to just sit down and make great looking HDR images, rather than wasting time trying to work out how to.
It might not be changing the game as Unified Color promises, but it certainly has improved the playing field.
Pros
- Excellent results
- Easy to understand sliders
- Quick to apply HDR settings
- Efficient multi-threading CPU usage
- Fast image alignment
- Poor image alignment
- Interface could be more responsive
- Price might be a bit high for some amateurs
Your Opinions and Comments
Be the first to post a comment!